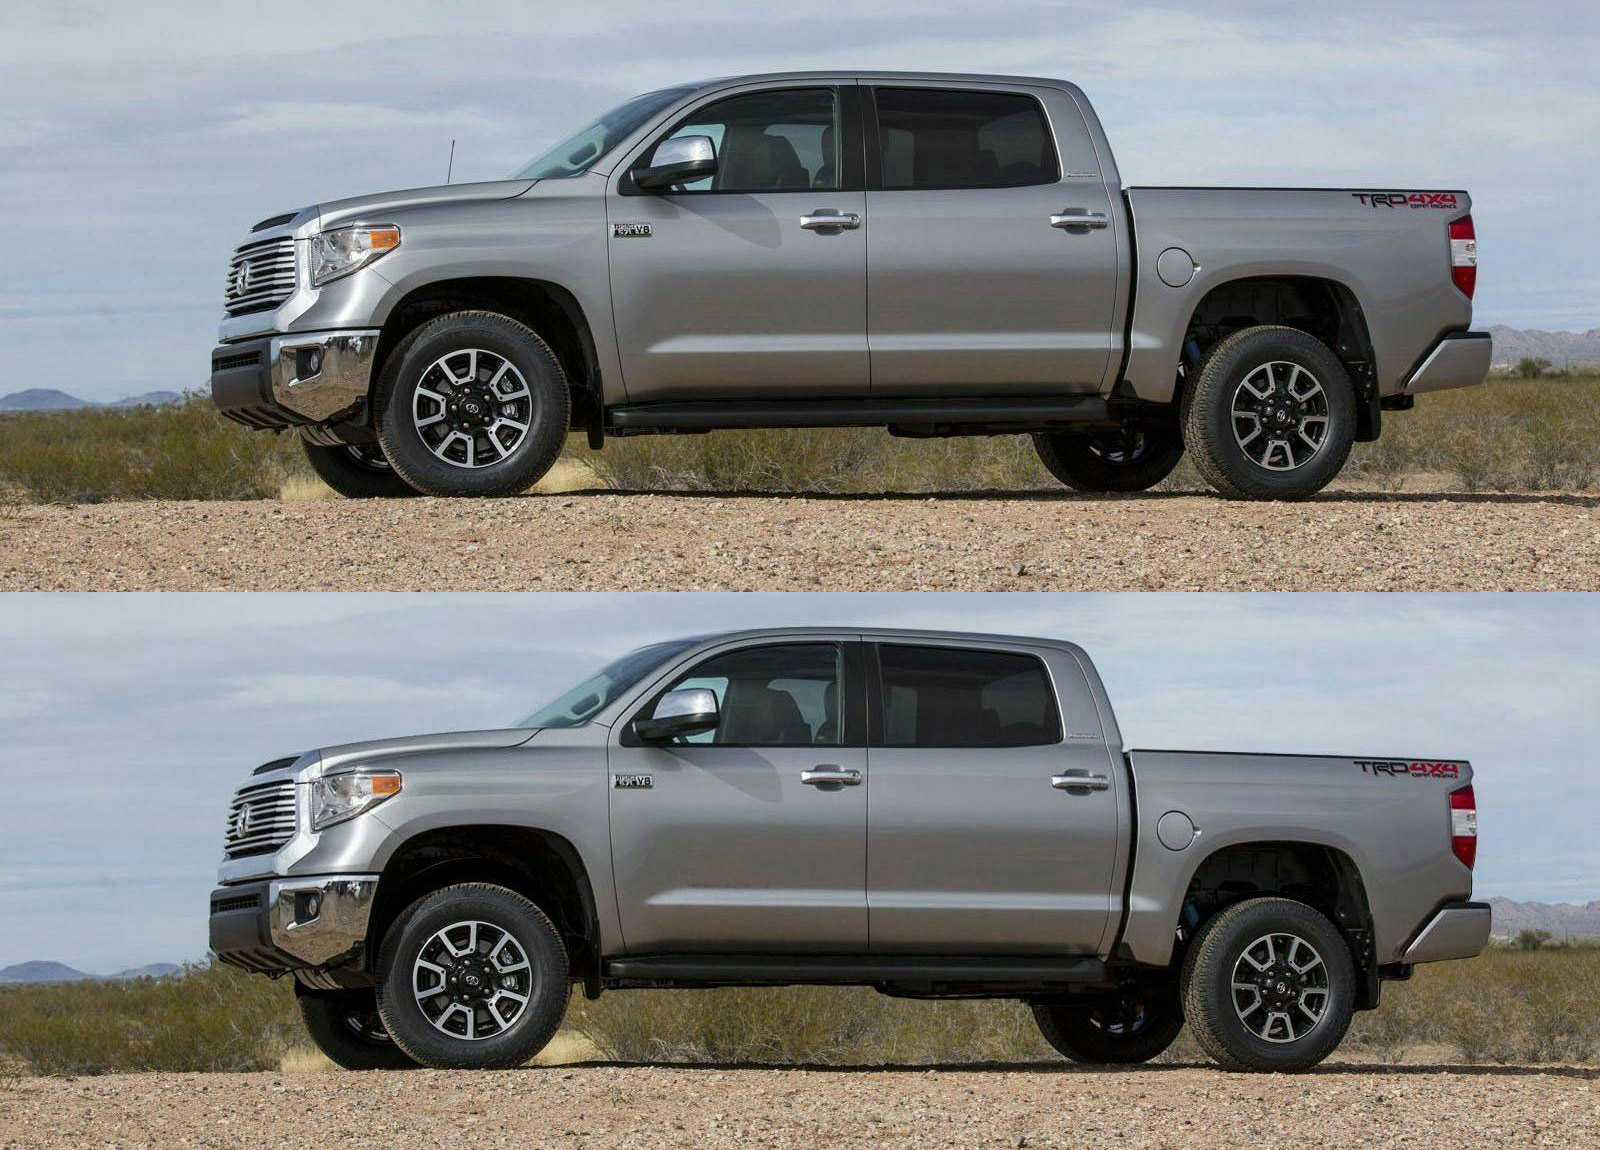
When it comes to enhancing the performance and aesthetics of your vehicle, one of the most popular modifications is installing an auto spring leveling kit. This simple yet effective upgrade not only improves the look of your vehicle but also provides practical benefits such as better ground clearance and improved handling. If you’re considering installing an auto spring leveling kit on your vehicle, this comprehensive guide will walk you through the process step by step.
Step 1: Gather Your Tools and Materials
Before you begin the installation process, it’s essential to gather all the necessary tools and materials. Here’s a list of items you’ll need:
- Auto spring leveling kit (make sure it’s compatible with your vehicle)
- Jack stands or ramps
- Hydraulic jack
- Wrench set
- Socket set
- Torque wrench
- Safety glasses
- Gloves
- Wheel chocks
Once you have everything you need, you’re ready to start the installation process.
Step 2: Prepare Your Vehicle
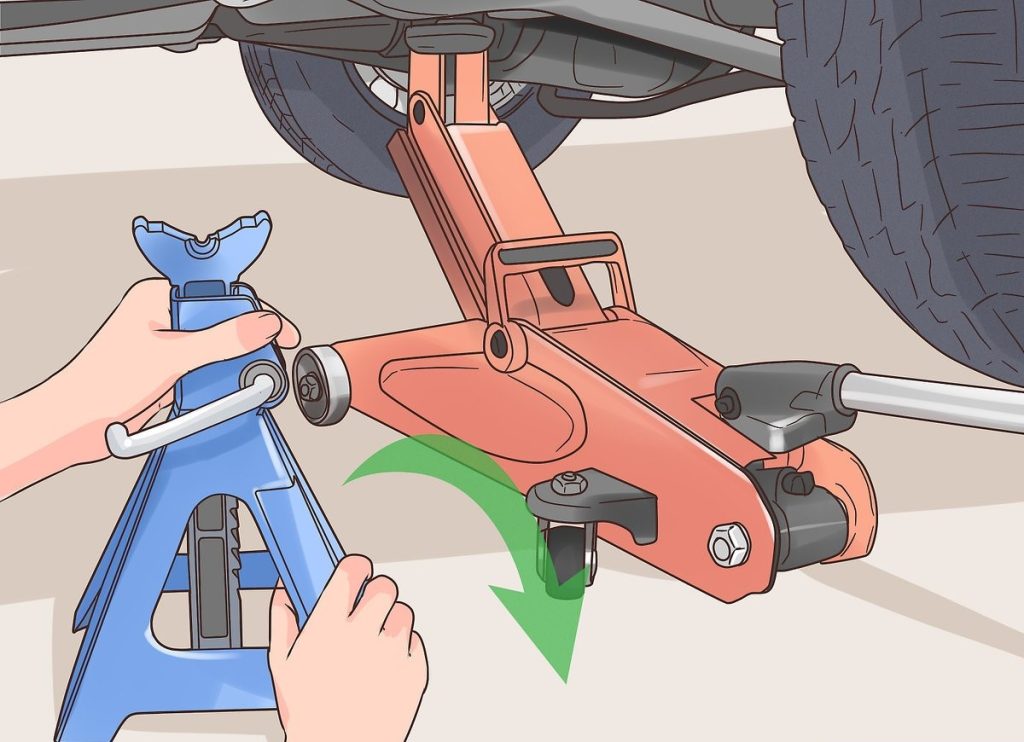
Park your vehicle on a flat, level surface and engage the parking brake. Place wheel chocks behind the rear wheels to prevent the vehicle from rolling. If you’re using a hydraulic jack, carefully lift the front of the vehicle and secure it with jack stands. Make sure the vehicle is securely supported before proceeding.
Step 3: Remove the Front Wheels
Using a lug wrench or a socket set, loosen the lug nuts on the front wheels. Once the lug nuts are loose, lift the front of the vehicle using the hydraulic jack and remove the wheels. Set the wheels aside in a safe place.
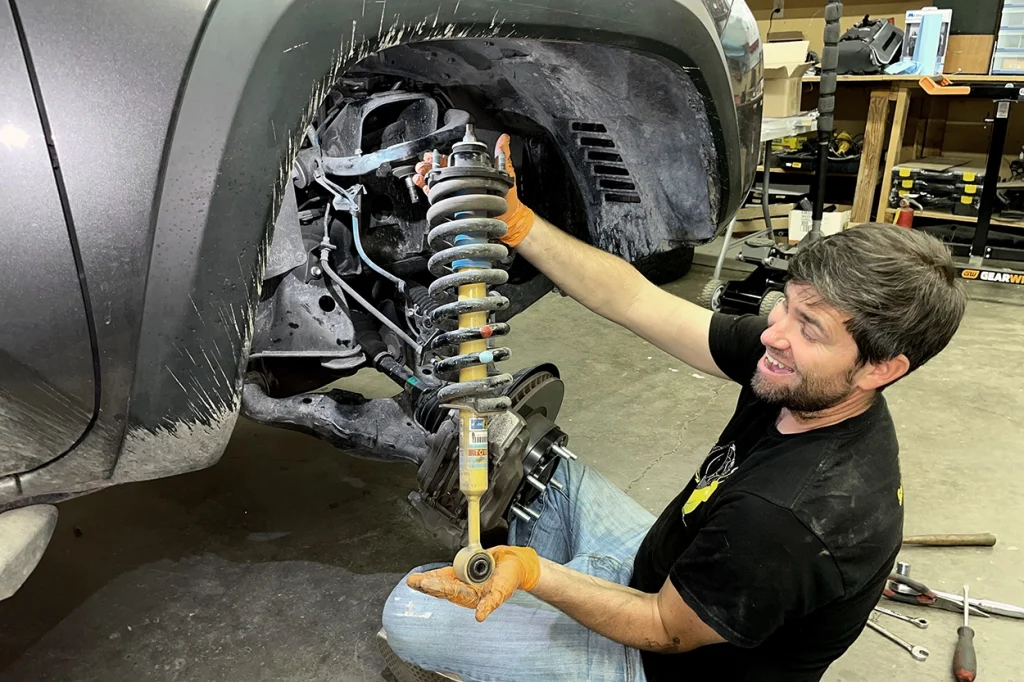
Step 4: Install the Auto Spring Leveling Kit
Follow the manufacturer’s instructions to install the auto spring leveling kit. Typically, this will involve removing the existing front suspension components and replacing them with the components included in the leveling kit. Use the appropriate wrenches and sockets to loosen and remove the bolts holding the old components in place.
Once the old components are removed, install the new components according to the manufacturer’s instructions. Make sure to tighten all bolts to the specified torque using a torque wrench to ensure proper installation.
Step 5: Reinstall the Front Wheels
With the leveling kit installed, carefully lower the front of the vehicle back onto the ground using the hydraulic jack. Once the vehicle is back on the ground, reinstall the front wheels and hand tighten the lug nuts. You can find out more at the link: https://outdoorlogic.net/
Step 6: Lower the Vehicle and Torque the Lug Nuts
Using the hydraulic jack, lift the front of the vehicle slightly off the ground and remove the jack stands. Carefully lower the vehicle back onto the ground and torque the lug nuts to the manufacturer’s specifications using a torque wrench.
Step 7: Test Drive and Adjust if Necessary
Before hitting the road, take your vehicle for a test drive to ensure everything is functioning correctly. Pay attention to the handling and ride quality, and make any necessary adjustments to the leveling kit if needed.
In conclusion, installing an auto spring leveling kit is a rewarding project that can significantly enhance both the appearance and functionality of your vehicle. By following the step-by-step guide provided in this article and exercising caution throughout the installation process, you can achieve professional-grade results in the comfort of your own garage.
With the leveling kit properly installed, you’ll enjoy benefits such as improved ground clearance, enhanced towing and hauling capabilities, and a more aggressive stance. Additionally, the leveled look of your vehicle will undoubtedly turn heads wherever you go.
However, it’s essential to remember that safety should always be your top priority. Take the time to gather all the necessary tools and materials, and don’t hesitate to seek assistance if you encounter any challenges during the installation process. Additionally, be sure to perform a thorough test drive after installation to ensure that everything is functioning correctly.
Overall, installing an auto spring leveling kit is a relatively straightforward and rewarding DIY project that can be completed in just a few hours. With the right tools, materials, and know-how, you can give your vehicle a custom look and improved performance that will be the envy of other drivers on the road.